How to synchronize videos with external audios
Recording audio with a external audio recorder allows to get the best audio quality, it also allows you to use polar patterns to reduce
unwanted background noise, but, when not using expensive gear with timecode synchronization, the camera's audio and the external
audio need to be synchronized in post production.
In the simplest scenario, we get one video per one external audio starting at different times, but things can get more complicated, for
example we can keep the video rolling and record several external audios.
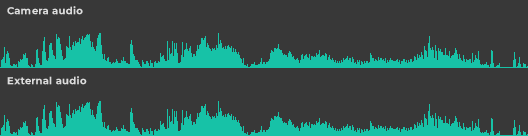
Manually synchronizing the camera’s audio with the external recorder is a tedious process, one of the methods is using a clapboard or
making a loud sound at the beginning of the recording, this will create a spike in both audios, and then in the editor we can locate and
align the spikes in the waveforms.
AV Sync doesn’t need clapping or timecode, it analyses the audios to sync the video with the external recorder audio.
AV Sync synchronizes videos and audios in the easiest way and supports automatically most common situations, for example:
•
one video and one external audio
•
one video and several external audios
•
one external audio and several videos
•
multiple camera videos with external audios
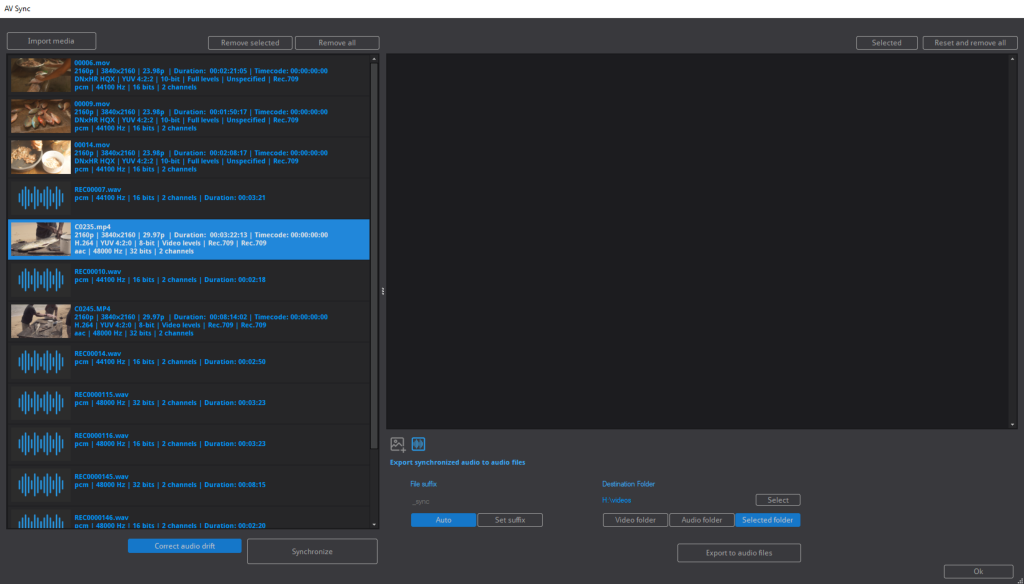
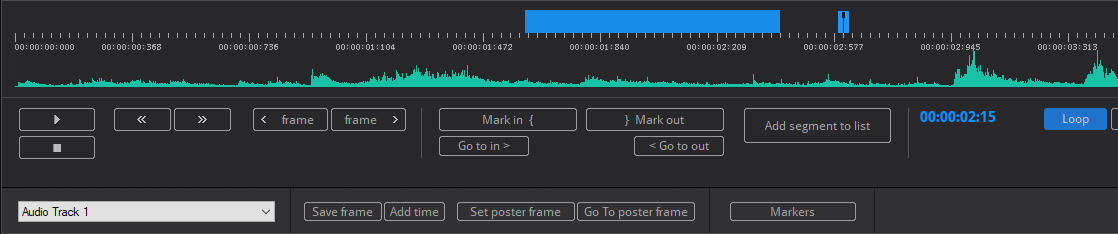
To start synchronizing, just import or drop in the media panel all the media to sync, the imported media appears with the video and audio information:
Copyright © 2025 Acrovid. All trademarks are property of their respective owners
Support
Products
Resources
About
Sign up for our newsletter to receive
news and special offers

™


Press/Affiliates
Share


About
About
What is the audio drift
Synchronize automatically videos with external audios
with drift correction
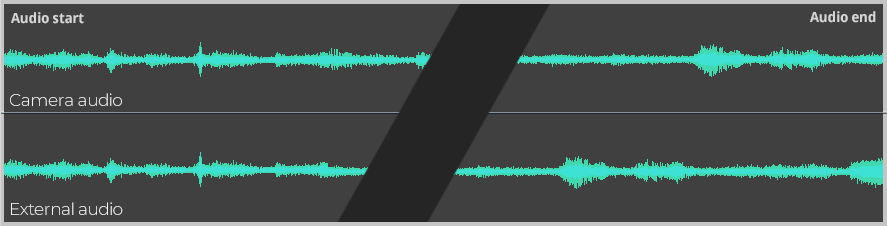
When recording external audio, specially in long recordings, audio drift may appear, the audio drift is not related to the video frame rate
or the audio sample rate.
The drift is caused by the different timing of the devices, producing different audio lengths recorded by the camera and by the external
recorder.
For example, we record 1000 seconds of video and external audio, this is, the video camera records 1000 seconds but the external audio
recorder records 1001 seconds of audio for the 1000 seconds of video recorded.
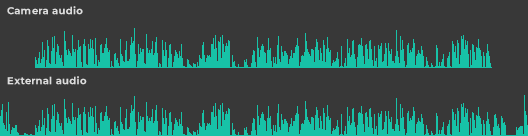
Then in post production, when trying to match the internal and external audio track in the editor, after aligning the audio start
waveforms, we can see that the end is drifted and out of sync, the audio and video sync changes over the duration of the recording:
AV Sync detects and corrects the audio drift automatically, just activate the drift detection and synchronize the media.
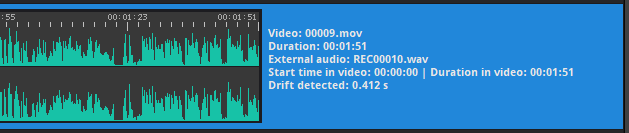
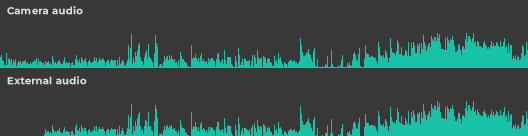
After the sync we can see in the external audio information if drift has been detected:
When exporting the synchronized videos or audios, the drift will be automatically corrected.
For detecting and correcting audio drift, activate the “Correct audio drift” button, if not activated, the audio drift will not be detected and corrected.

Now just press the button “Synchronize” to start the sync.
After the synchronization is finished, the synchronized videos with the external audios will appear in the synchronized panel:

In the synchronized panel we can check the video sync information, for example:

The video 00006.mov syncs with the external audio REC00007.wav.
The external audio starts at 00:00:00 and the duration is 00:02:21, so it covers all the video length.
And there is a detected audio drift of -0.585 seconds.
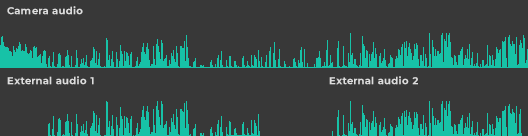
In this case, the video syncs with several external audios:
The video C0245.mp4 syncs with the external audios REC0000146.wav and REC0000147.wav.
The external audio REC0000146.wav starts at 00:00:33 and the duration is 00:02:20, with a drift of -0.061 seconds.
The external audio REC0000146.wav starts at 00:03:50 and the duration is 00:03:45, with a drift of -0.073 seconds.

As we can see, the external audios only cover part of the video length.
The created synced audios always have the same length as the video, in the case the synced audio length is shorter than the video, silence will be added
to match the video length.
1: Import the videos and external audios
2: Synchronize the media
3: export the synchronized videos or audios
The synchronized media can be exported to the media list, or synced audio files can be created.
Export the synchronized audios to audio files
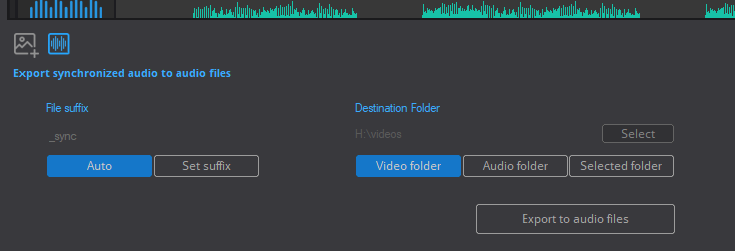
To create synced audio wav files, select “Export synchronized audio to audio files”.
The created audios will have the same filename as the synced video, with the suffix “_sync”, to change the suffix select the “Set suffix” button.
The destination folder for the audios can be the same folder as the video, the same folder as the non-synced audio, or it can be selected by checking
the button “Selected folder”
Press the button “Export to audio files” to create the audio files.
This will create all the audio files, if you want to export only the selected audio, check the button “Selected” or click the right mouse button over a video.
In case a video syncs with multiple external audios, a synced audio file will be created for each external audio.
Export the synchronized audios to media list
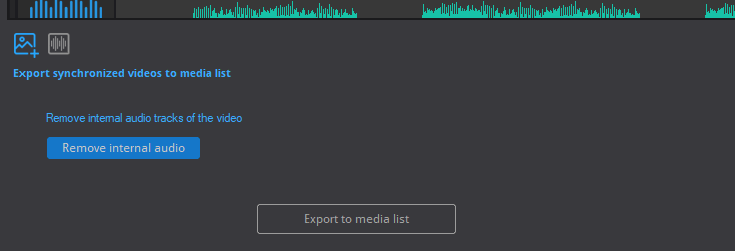
To send the videos with the synced audios to the media list, select “Export synchronized videos to media list”.
If you want to remove the video internal audio, check the button “Remove internal audio”.
Press the button “Export to media list” to start the synchronization.
After the processing, the videos with the created synced audios will appear in the media list:
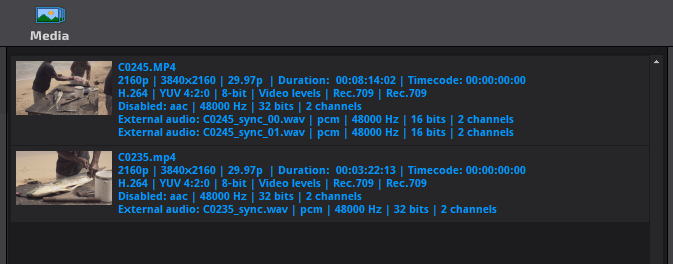
In this case the internal audio track appears as “disabled” cause the button “Remove internal audio” was checked.
We can restore the internal audio track, or remove any external audio by click over the video with the right mouse button and selecting the
menu “Select audio tracks / external audio tracks”.
Now we can for example cut the unneeded parts of the video in the trim dialog, or apply any processing setting like convert from cameras
format to SDR or HDR.
Also, in the audio tab we can apply a filter or convert the audio parameters , for example convert the sample rate.
The video is ready for encoding or re-wrapping.
Tips and tricks

Synchronize only selected media
When starting the synchronization, all media in the list will be
synced.
But if selecting more than one media, for example a video and
an audio, only the selected media will be synchronized.
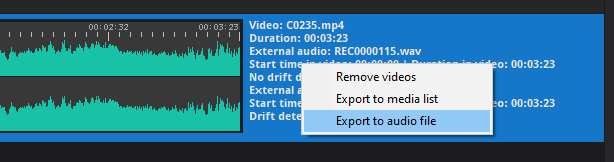
Export only one synchronized video or audio
After the synchronization, select a video and with the right
mouse button menu the video can directly be exported to
media list or audio file.
Checking the synchronized videos
After synchronization, the videos with the synchronized audio
can be checked in the player/trimmer dialog.
Just export the video to media list, open the video in the
player/trimmer dialog, and select the external audio track.
If you want to export only the synced audios to files, after
checking you can remove the video from the media list and
export the audios in the AV Sync dialog.
Recording and synchronizing external audios
Acrovid AV Sync tutorial
Download media samples for testing
These are several videos and external audios for testing purposes.
Media samples are taken from the excellent 1968 film “The night of the living dead”, actually in public domain.
Sample 1
External audio starts before video and ends after video, no audio drift:
v00001.mp4
REC00001.wav
Sample 2
External audio starts after video with audio drift:
Sample 3
Two external audios along the video, no audio drift:
Sample 3
External audio with big audio drift:

v00002.mp4
REC00002_drift.wav
v00003.mp4
REC00003_1.wav
REC00003_2.wav
v00004.mp4
REC00004_dritf.wav
AV Sync tutorial